# Providing Liquidity
Once you've selected a market (see [Testnet UI Walkthrough](https://element-2.gitbook.io/element-docs/element-protocol/testnet-ui-walkthrough)) you can add or remove liquidity from it.
{% tabs %}
{% tab title="Adding Liquidity" %}
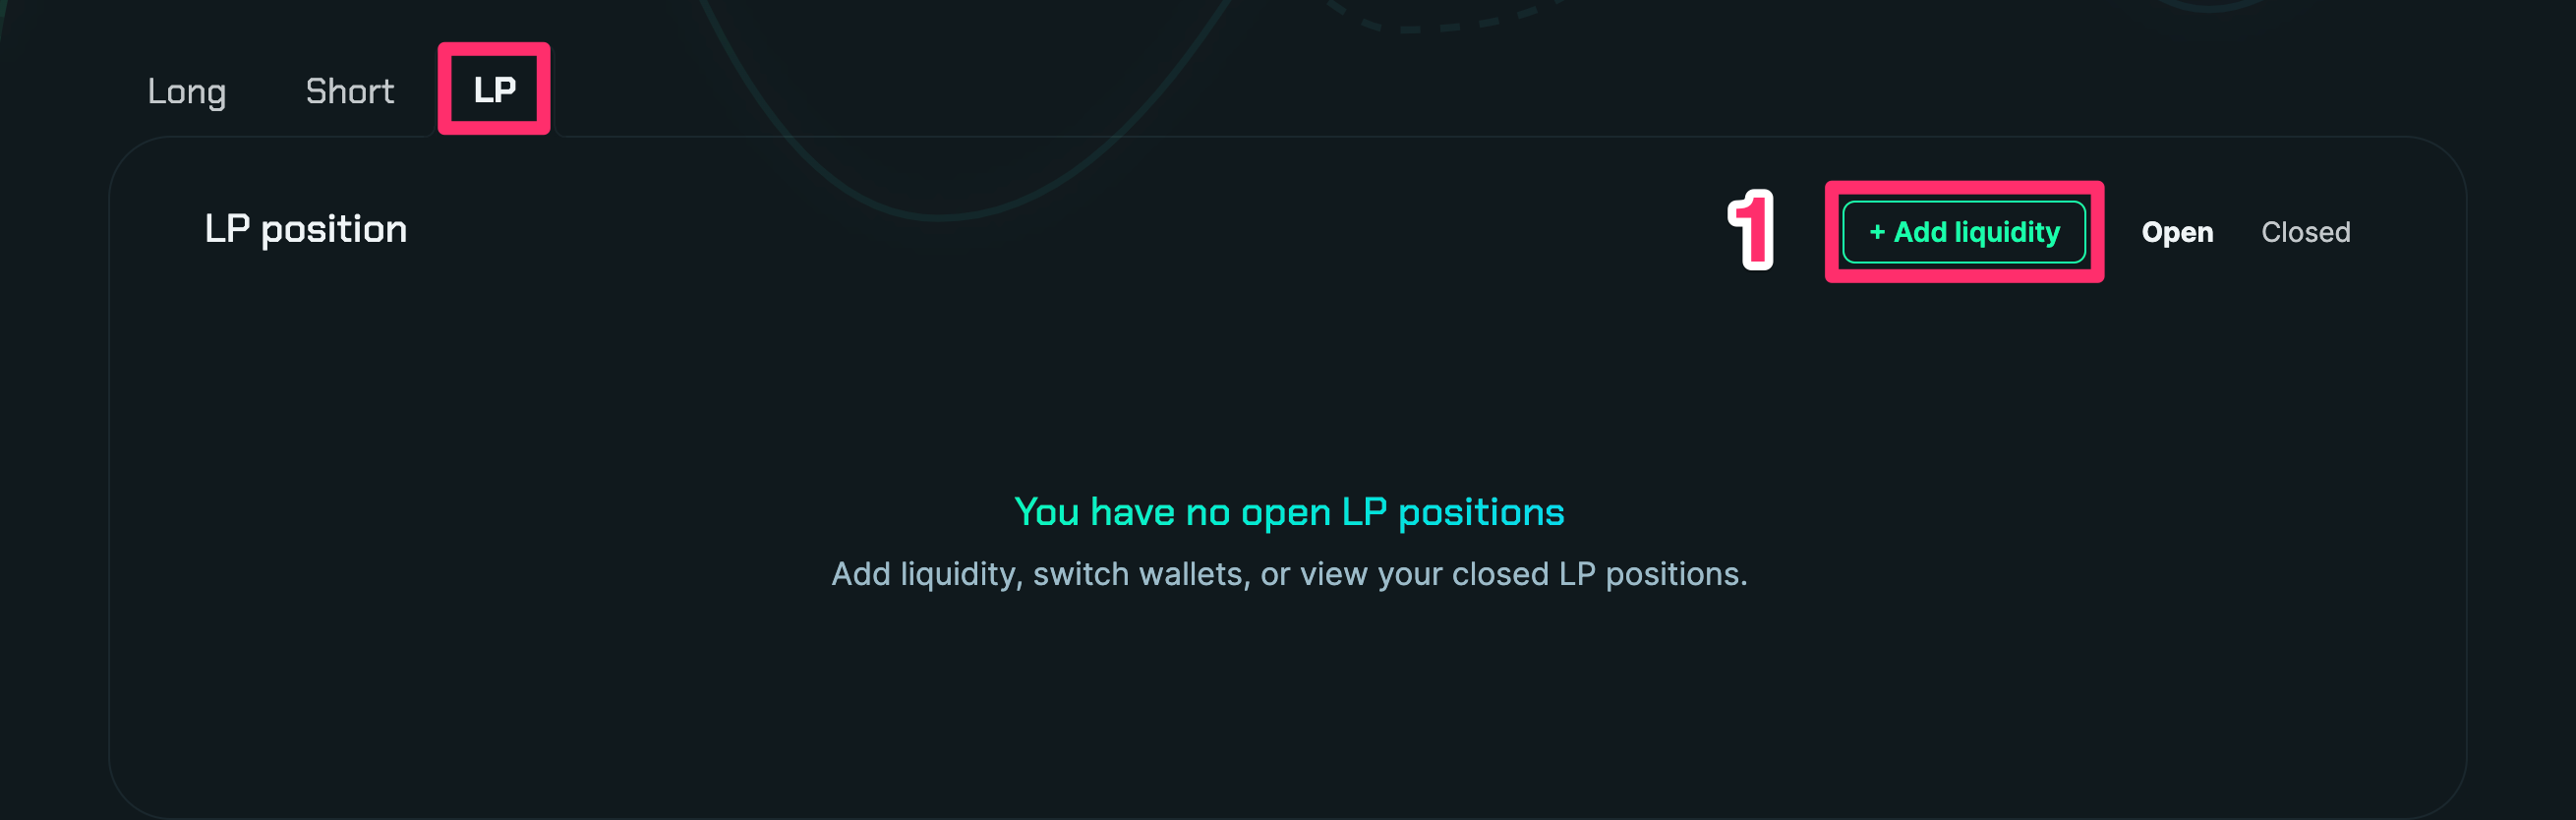
1. Click on the **Add Liquidity** button on the **LP** tab of the page.
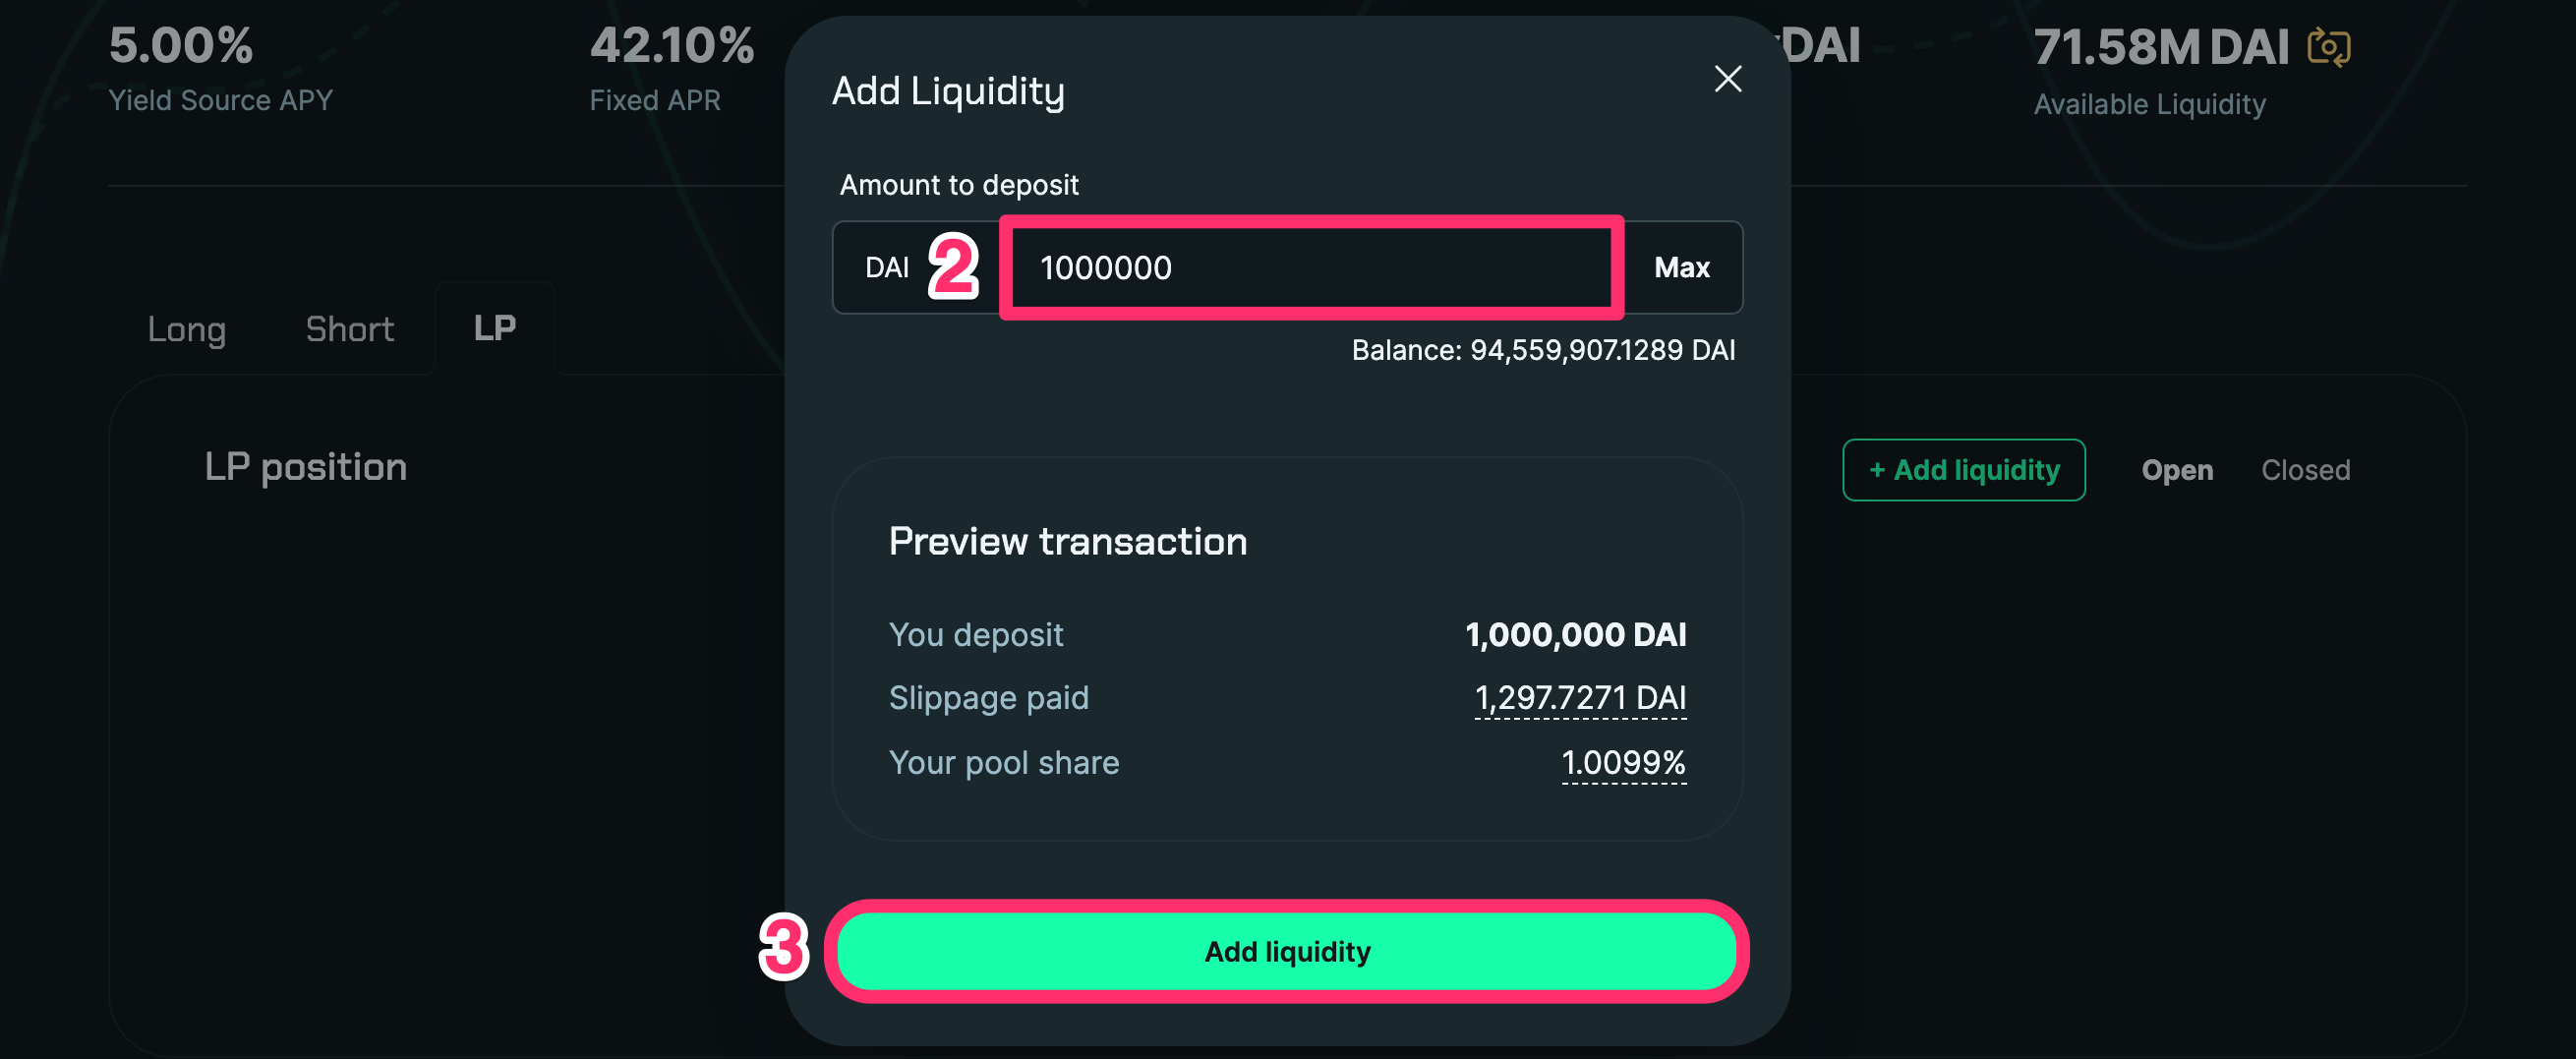
2. Input the amount you want to deposit. You can review the resulting position here before proceeding.
3. Click on the **Add Liquidity** button. This will prompt a transaction on your web3 wallet.
Once the transaction is executed on the blockchain, your open position will be listed on the **LP** tab.
{% endtab %}
{% tab title="Removing Liquidity" %}
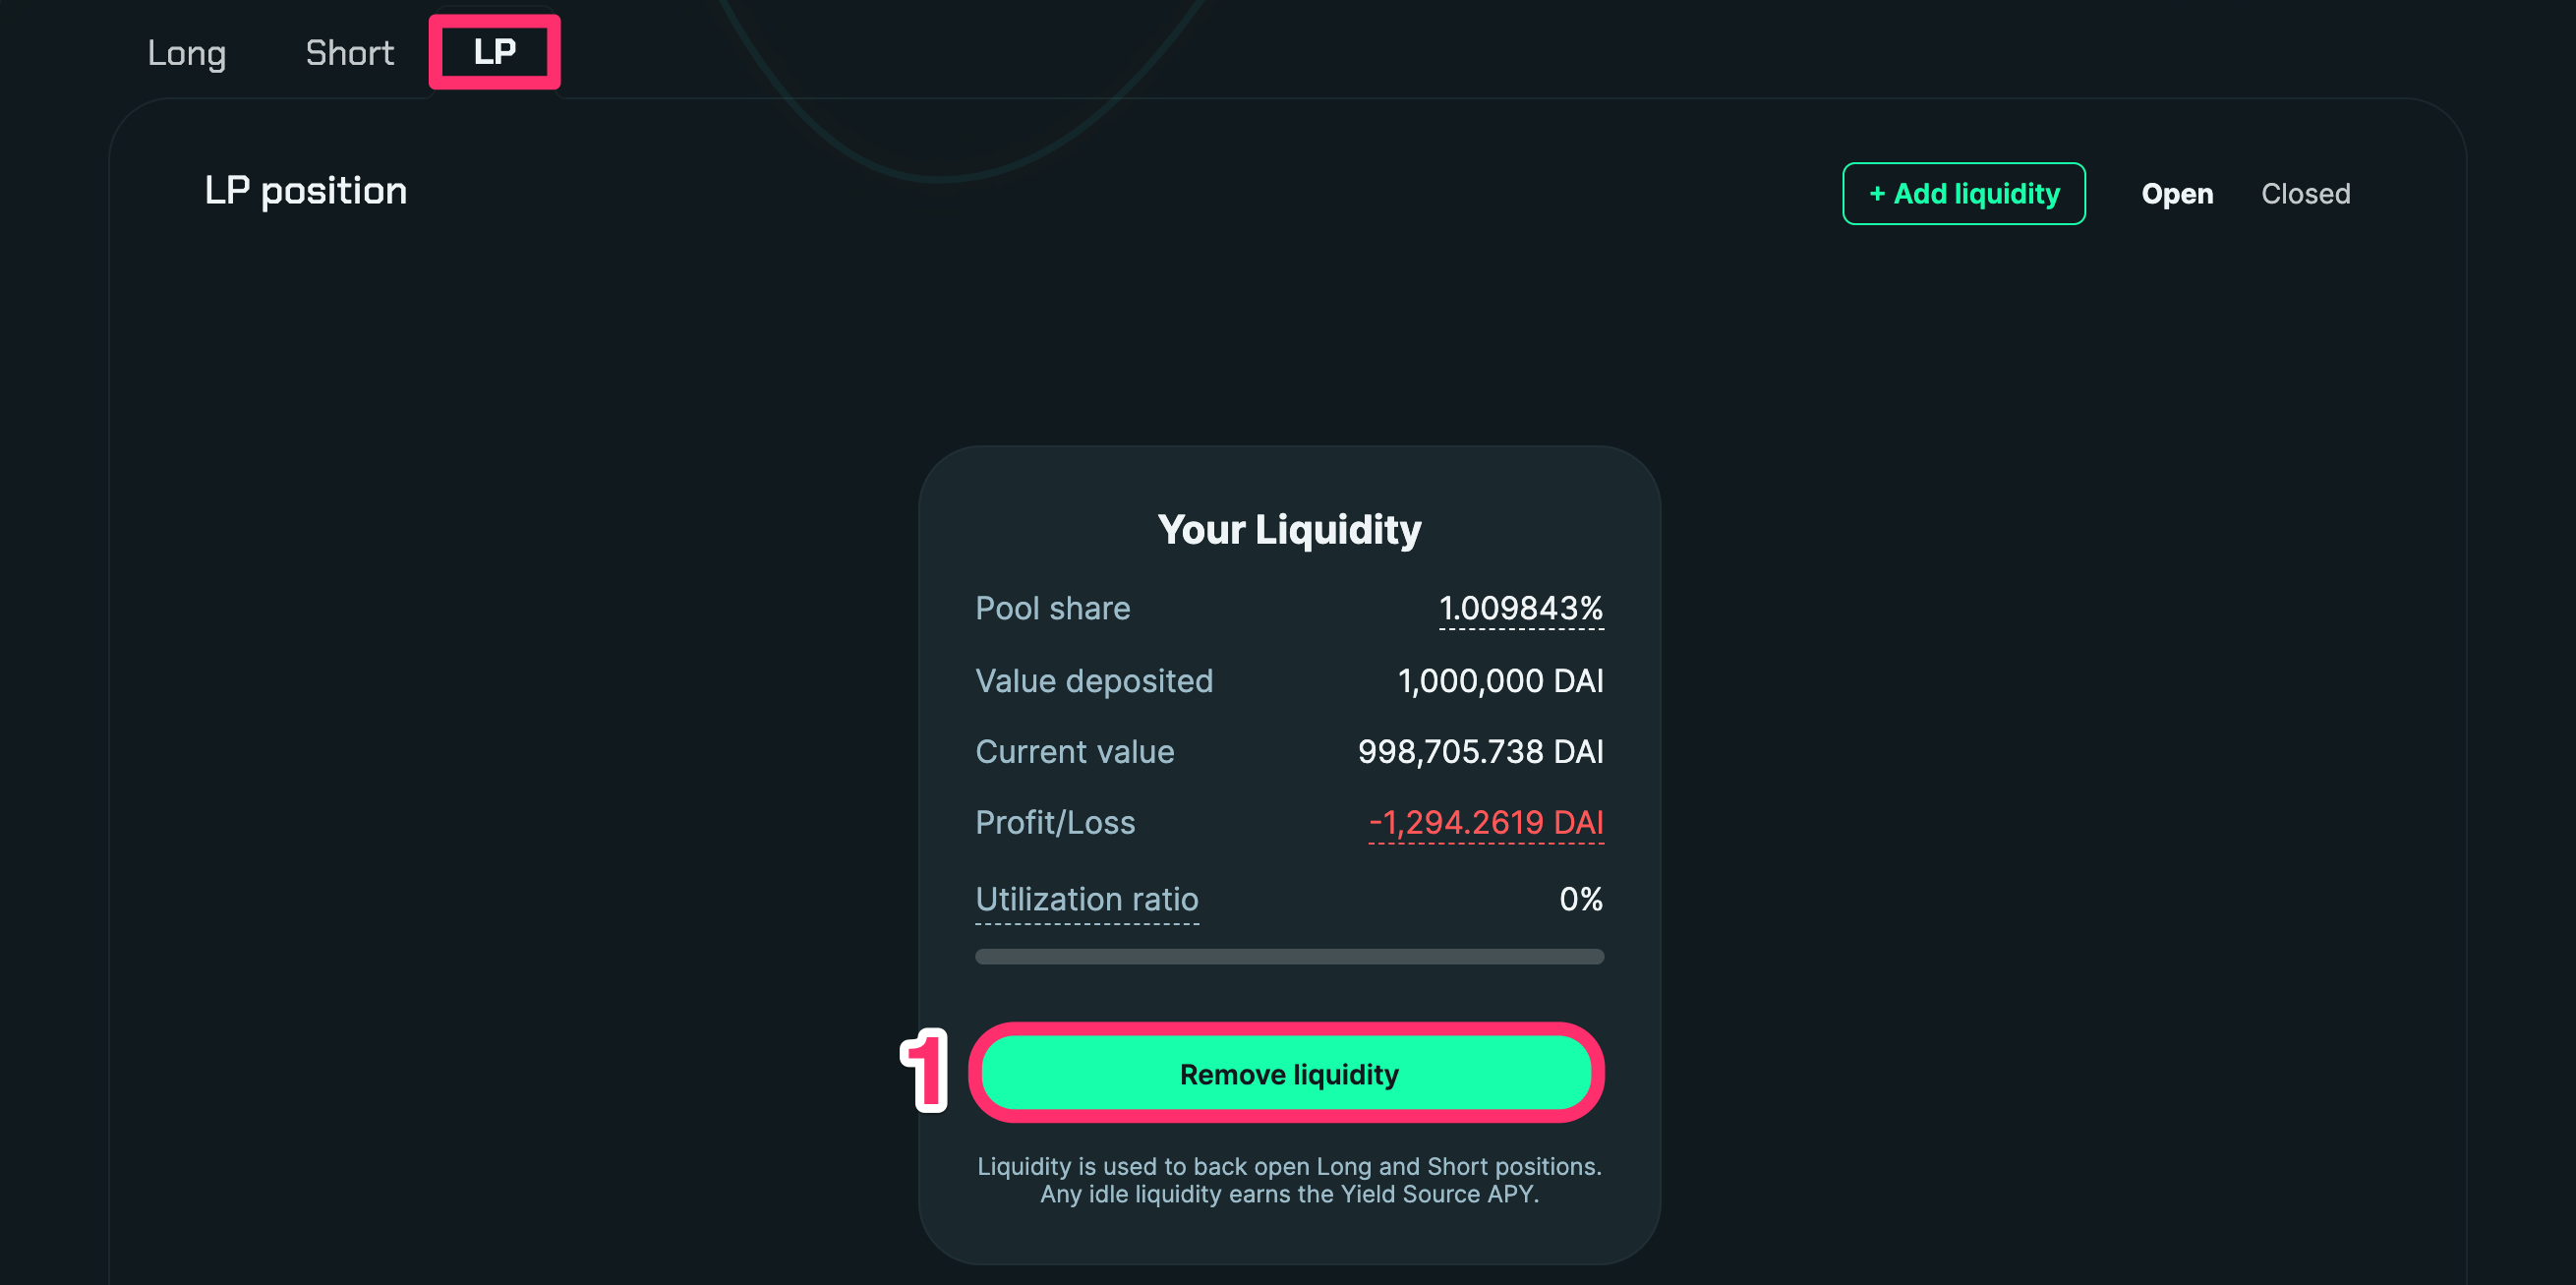
1. Click on the **Remove Liquidity** button on your LP position under the **LP** tab of the page.
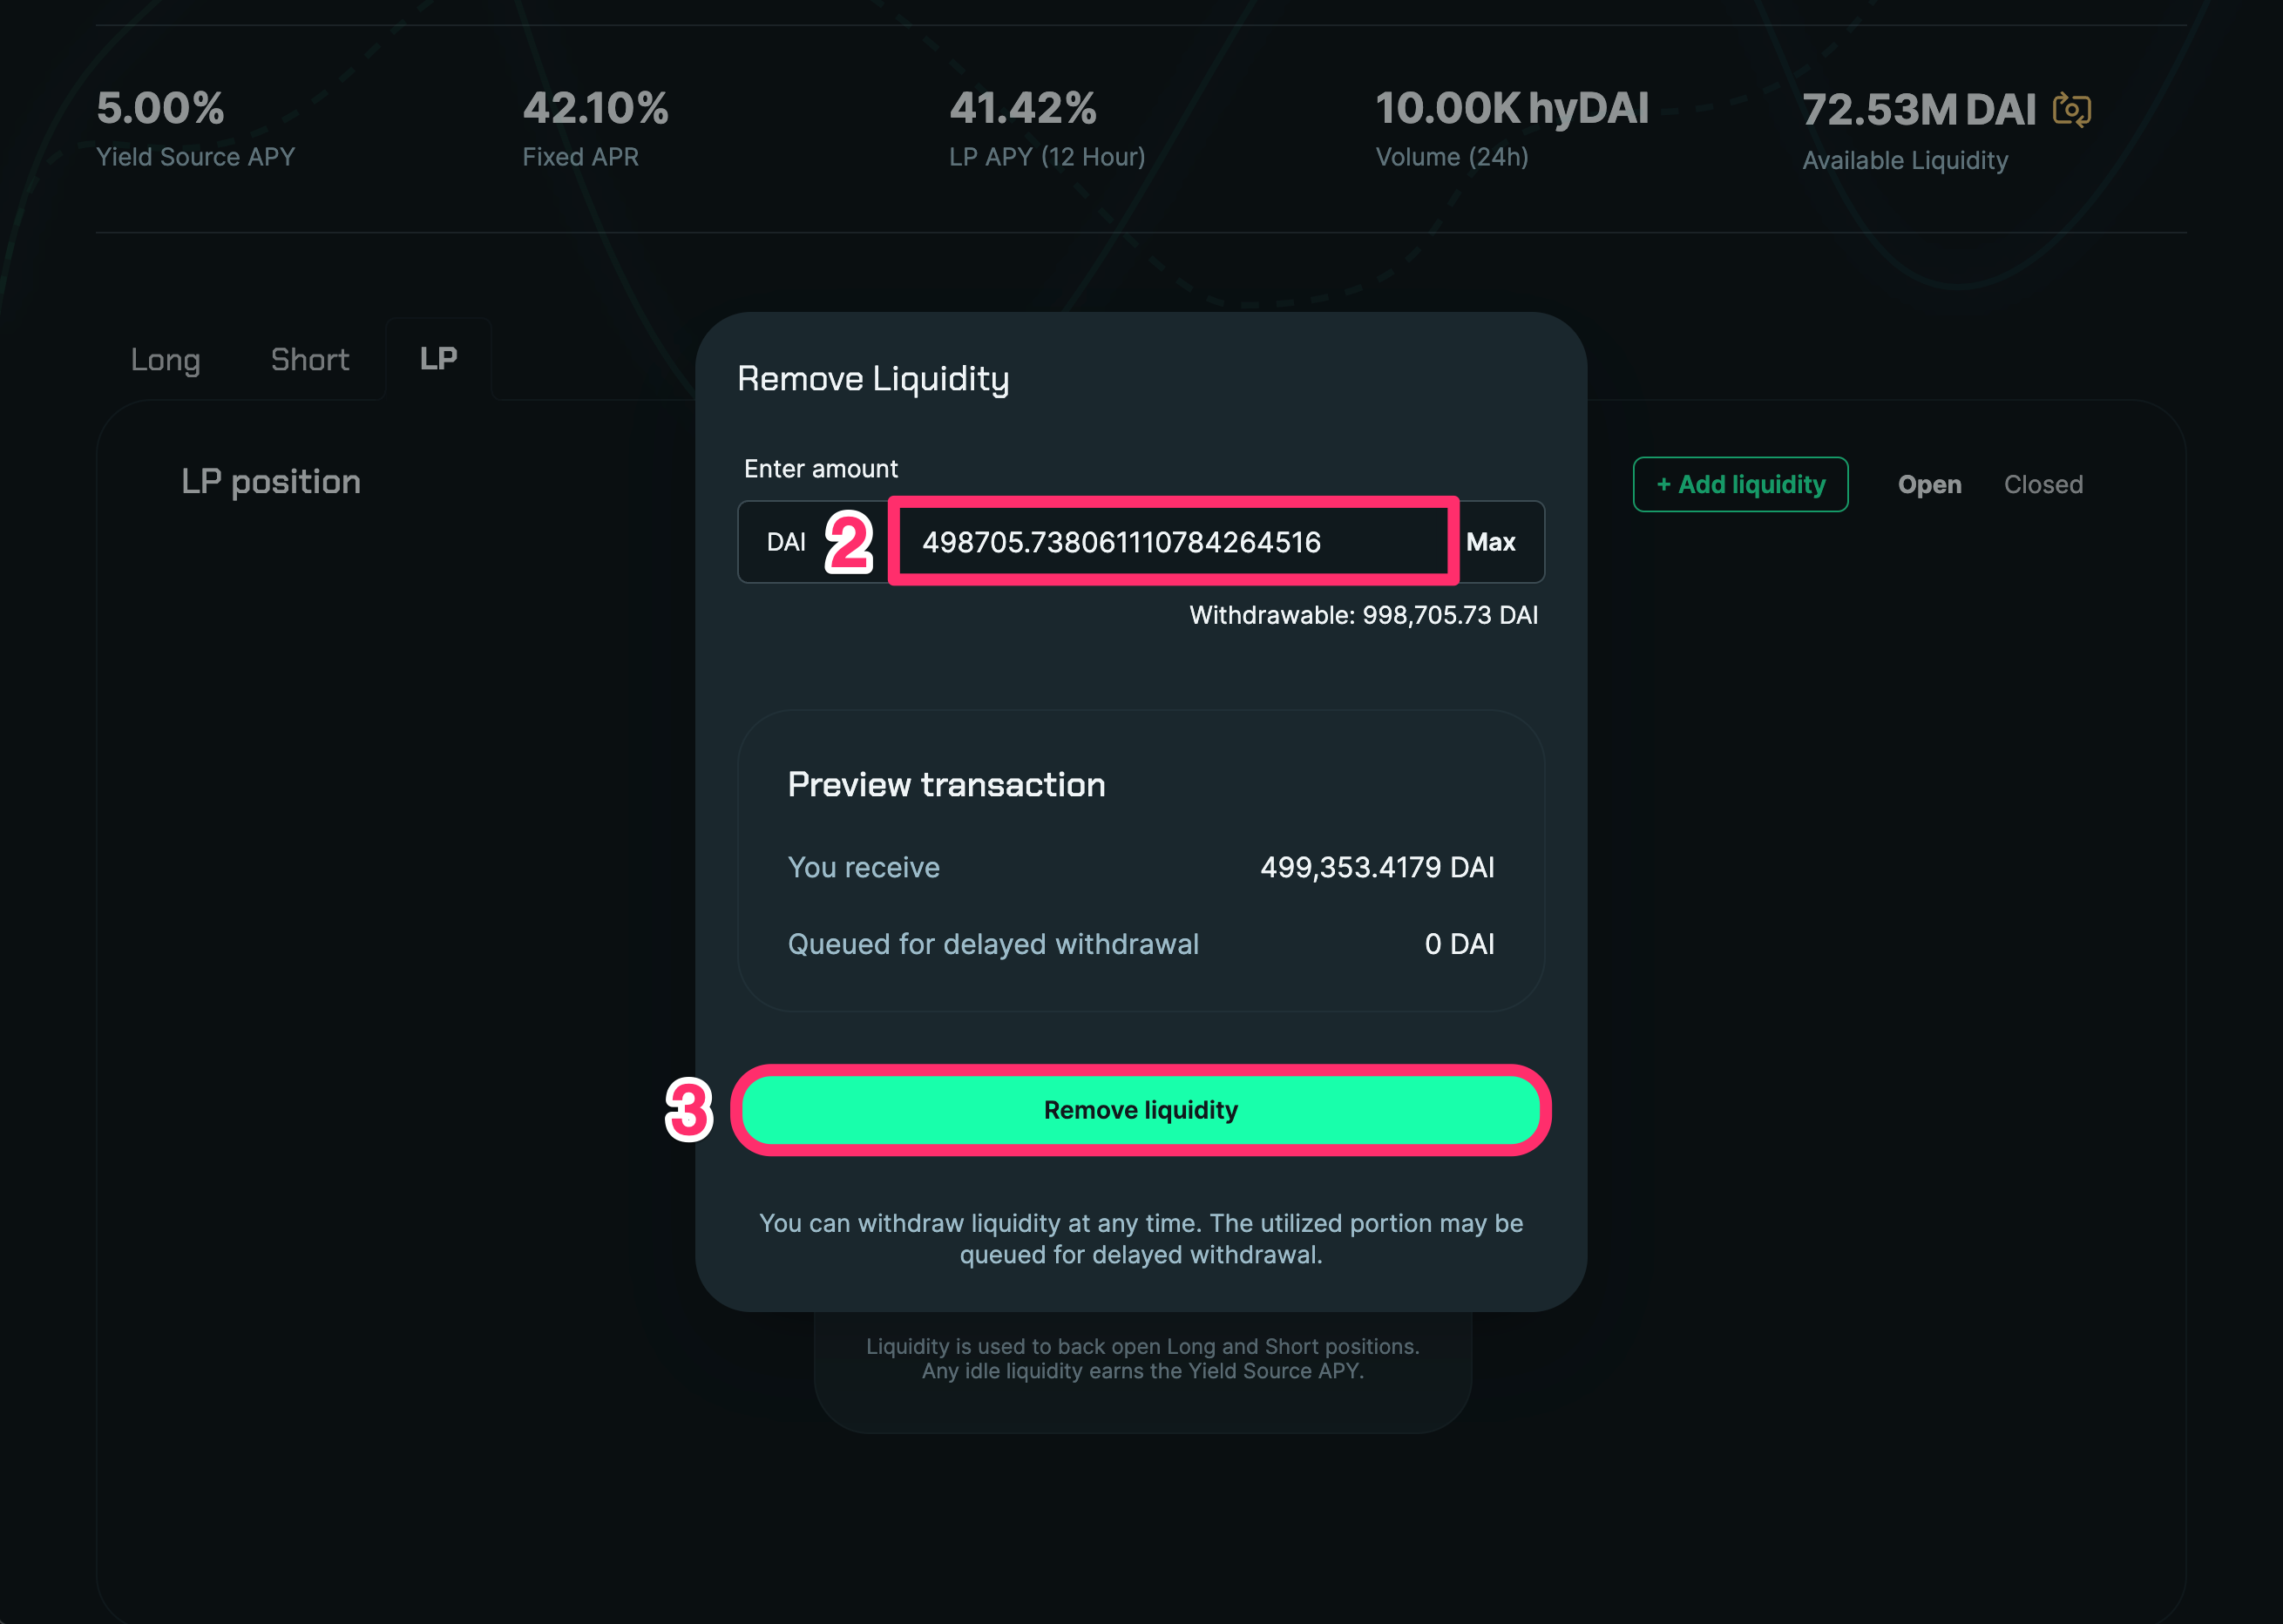
2. Input the amount of liquidity you want to remove.
3. Once you've checked your inputs and the transaction preview, click on the **Remove Liquidity** button. This will prompt a transaction on your web3 wallet.
Once the transaction is executed on the blockchain your position will be closed. You can still see its details under the **Closed** tab.
{% endtab %}
{% tab title="Delayed Withdrawals" %}
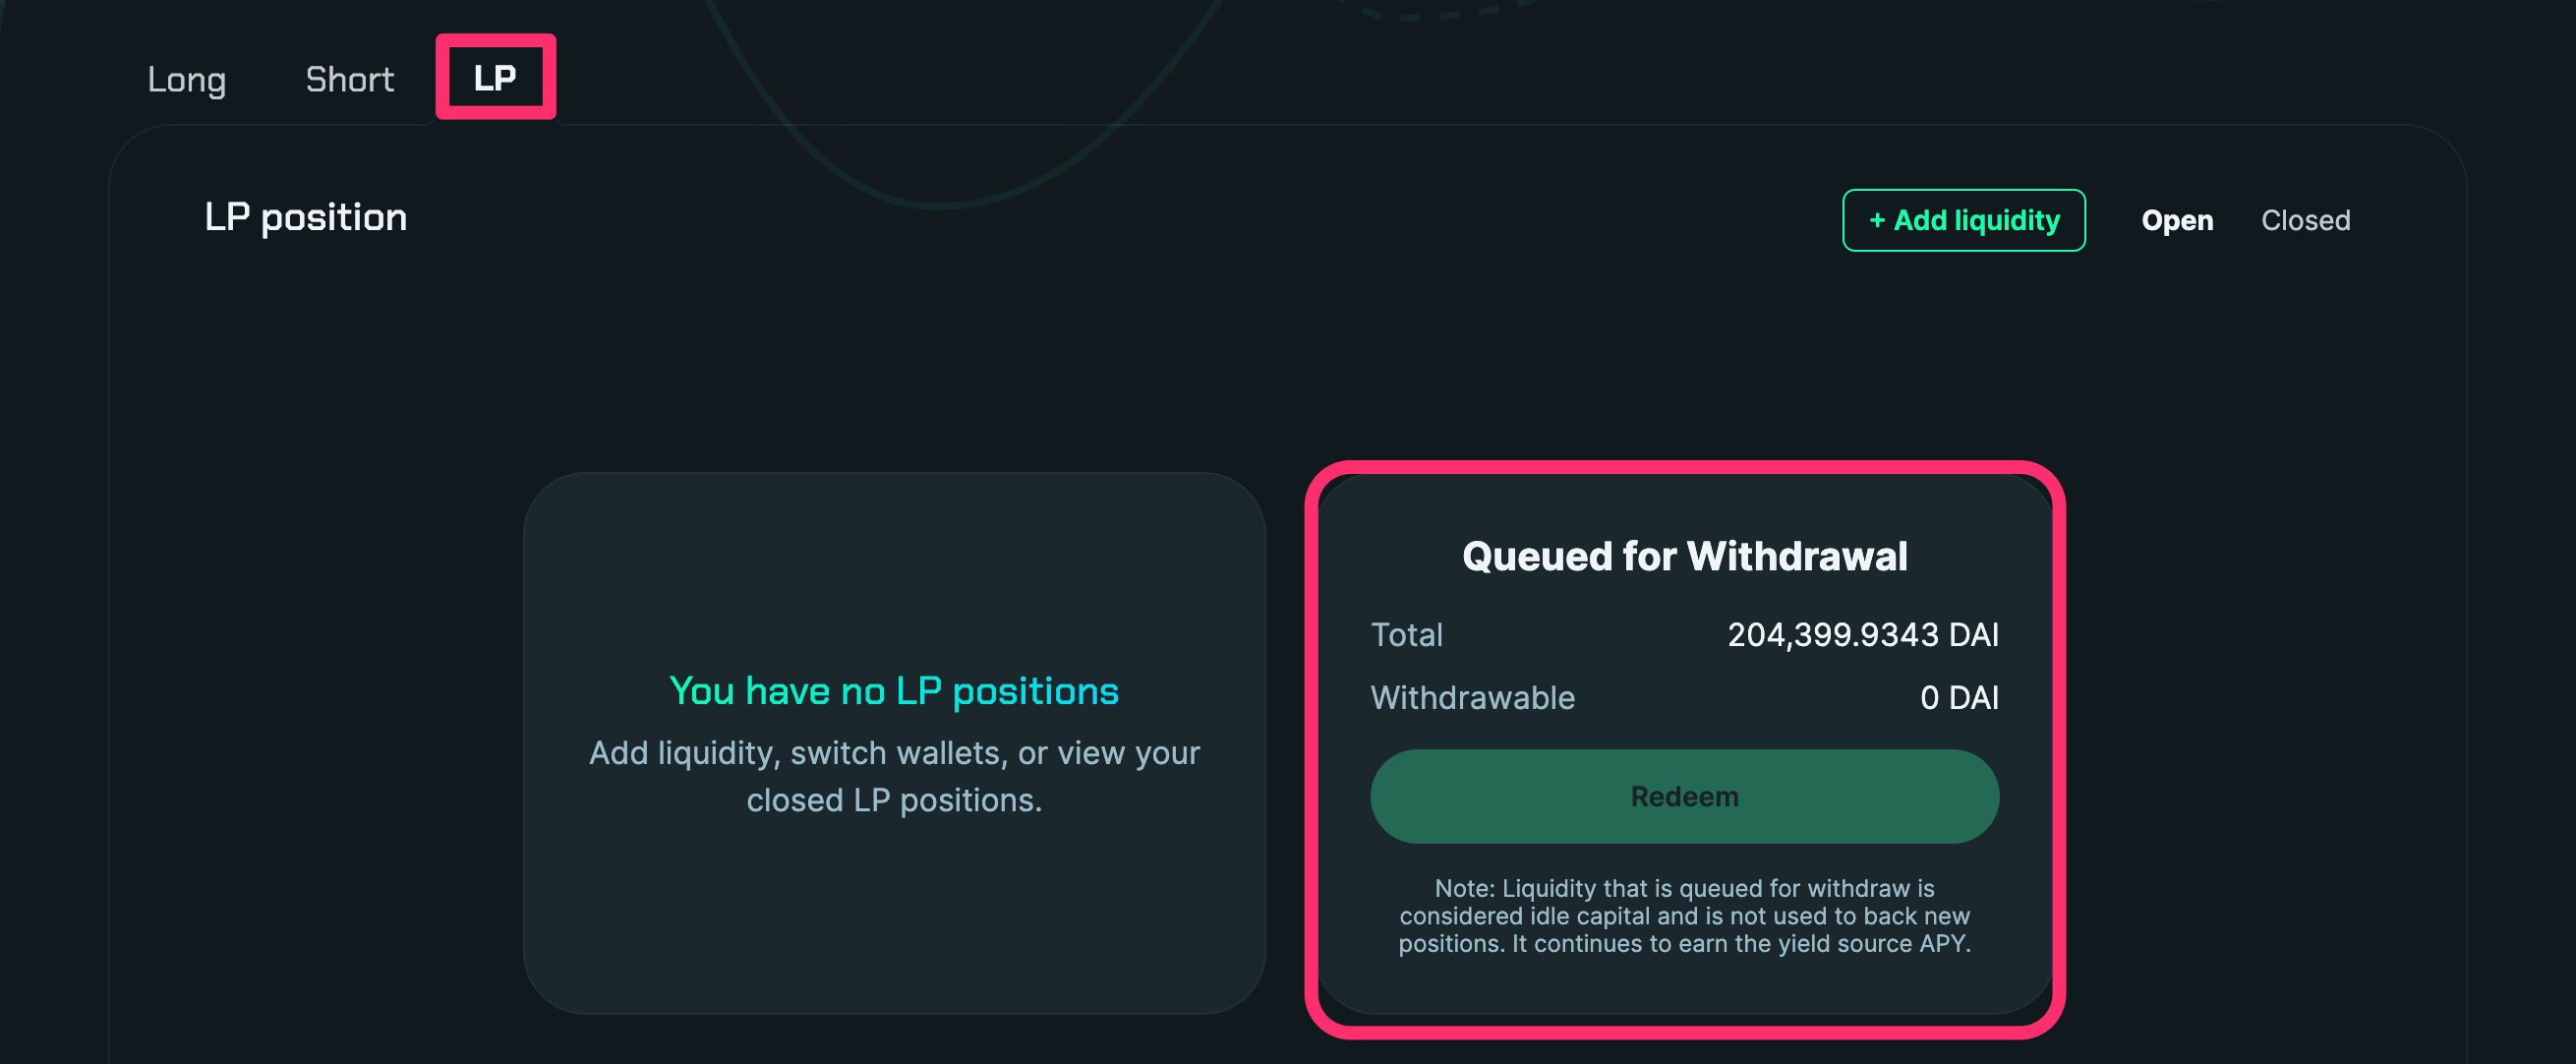
If you've tried to remove liquidity that was being utilized to back open user positions, you may have started a [Delayed Withdrawal](https://element-2.gitbook.io/element-docs/element-protocol/testnet-ui-walkthrough/broken-reference) process. If there is no unutilized liquidity available to withdraw, the **Redeem** button will appear disabled:
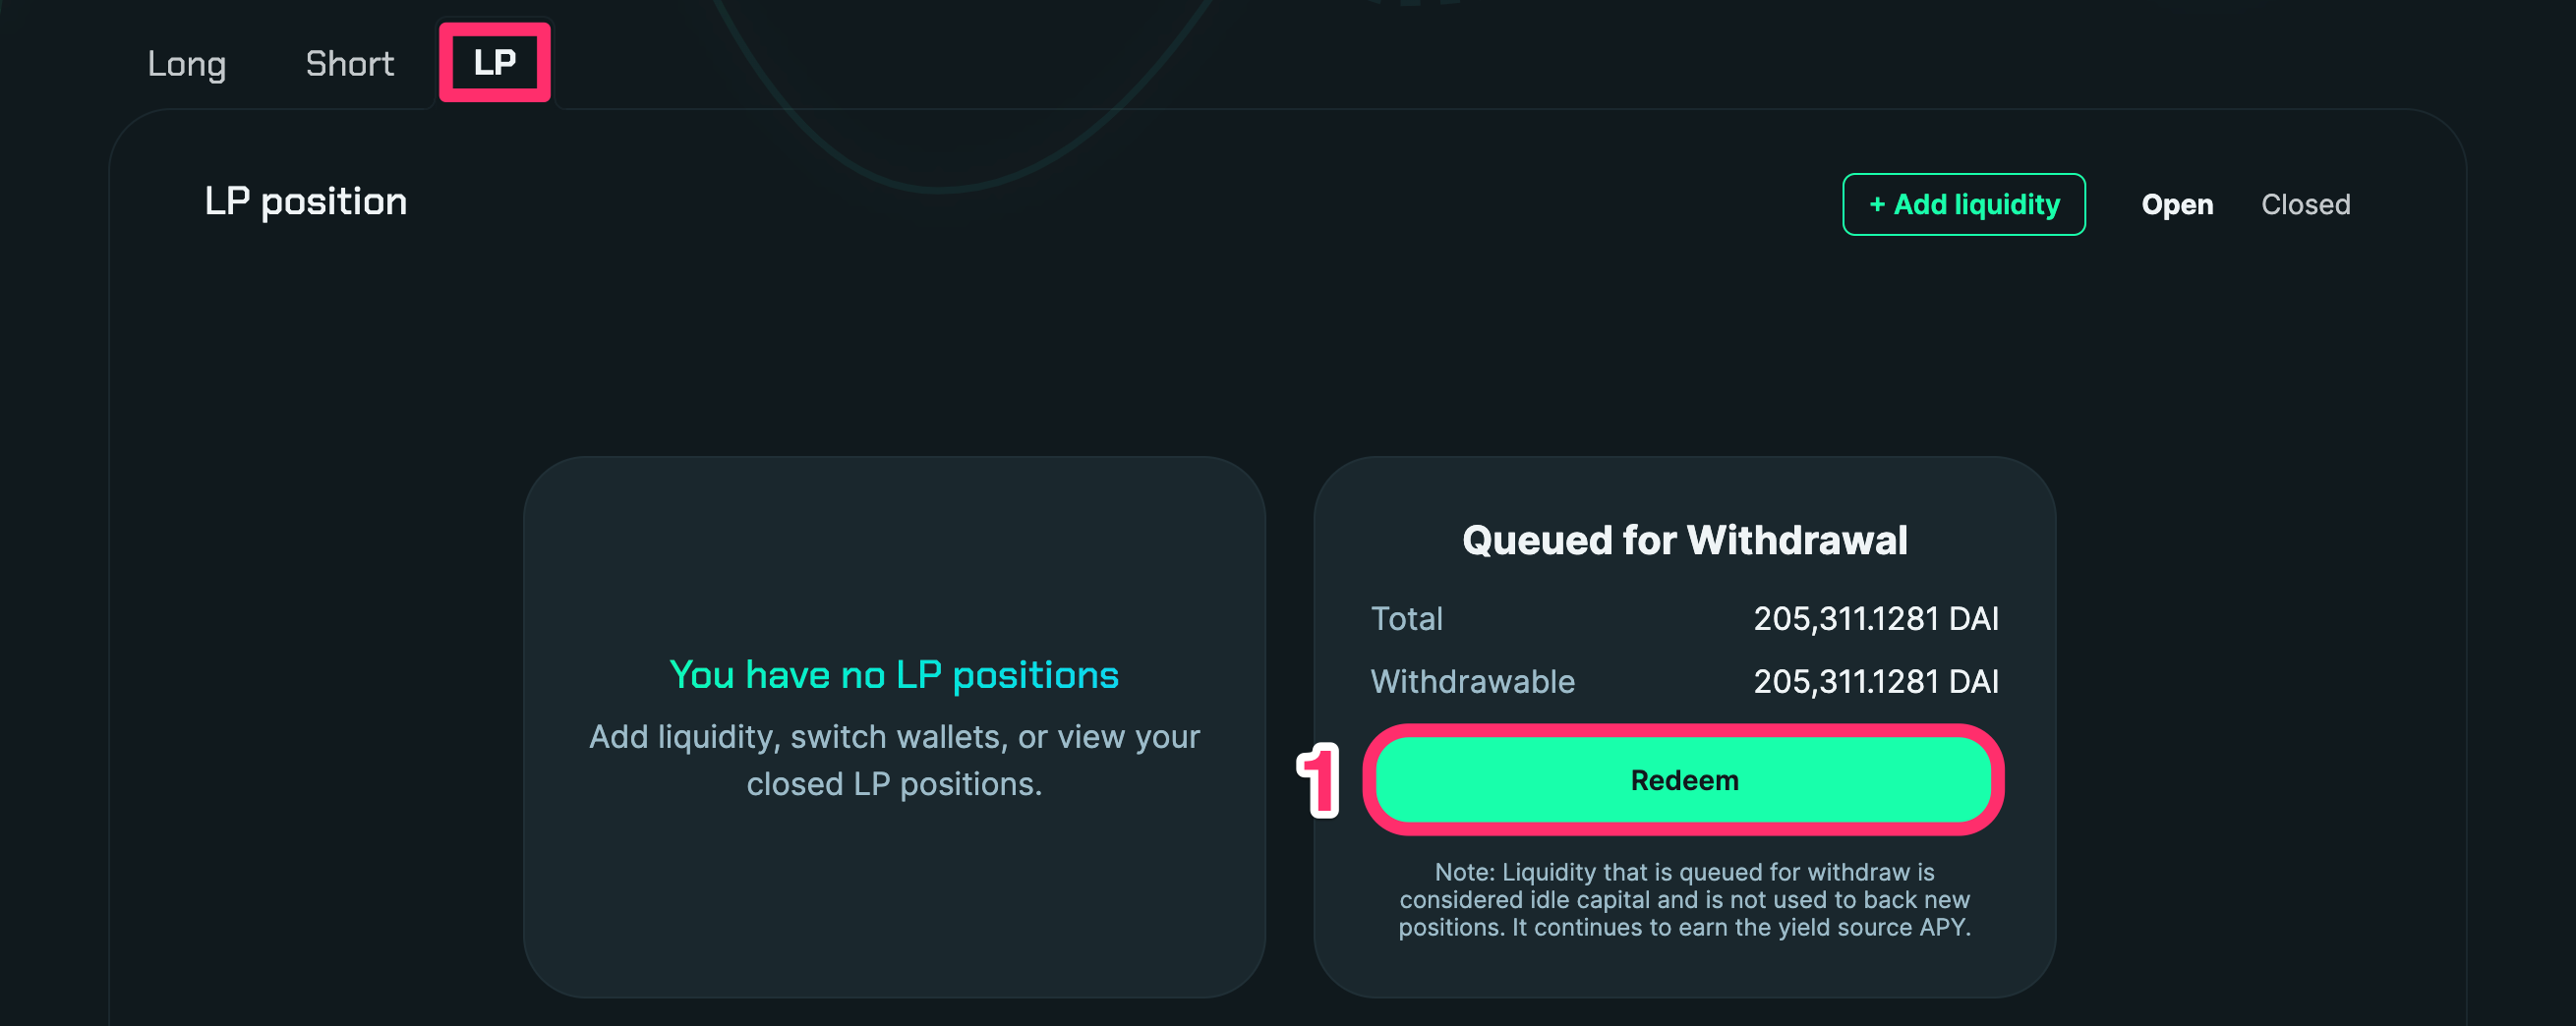
Once liquidity becomes available, you can complete your delayed withdrawal process:
1. Find your **Queued withdrawal** under the **LP** tab in the page and click on the **Redeem** button. A form will pop up.
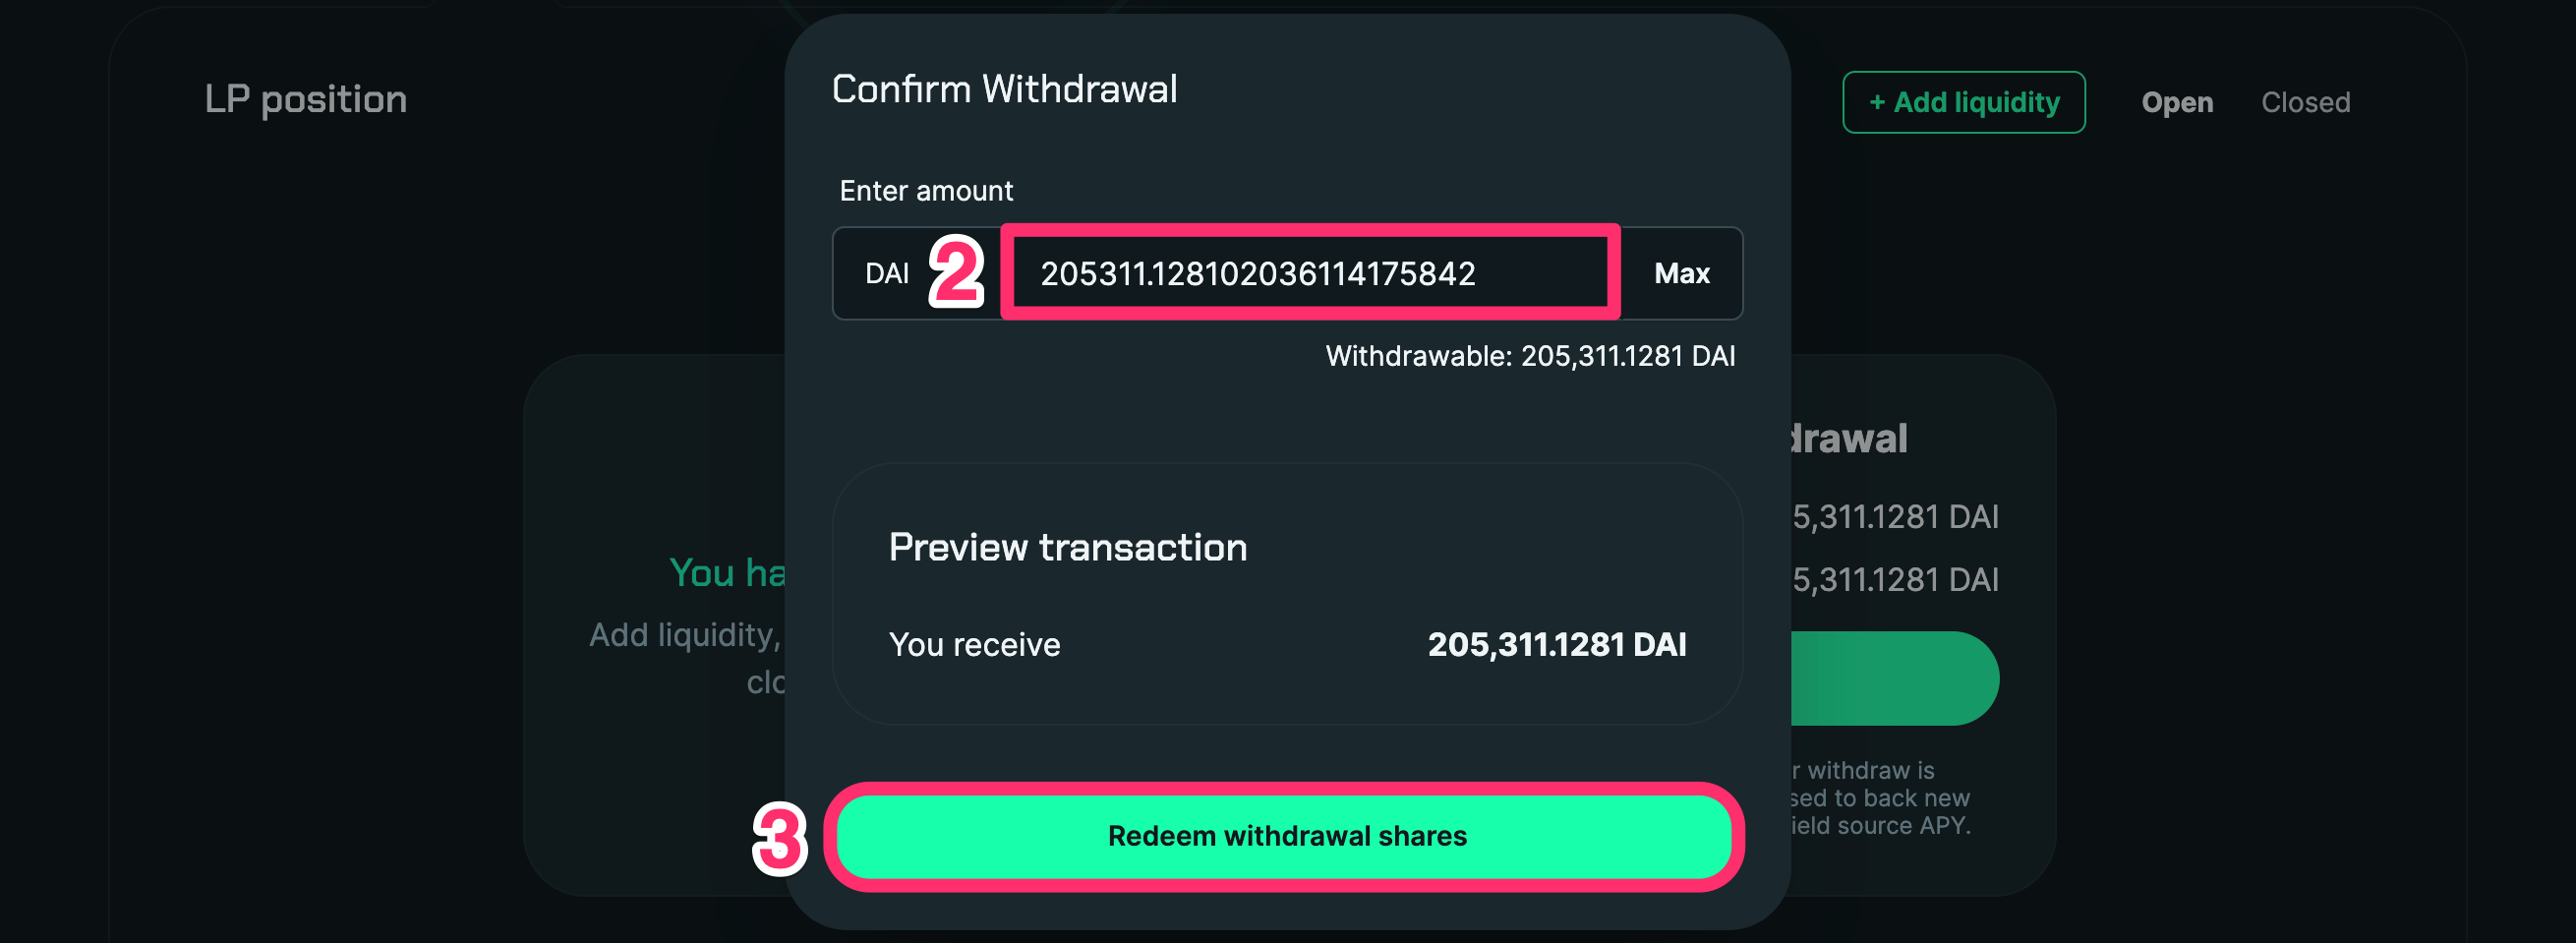
2. Input the amount you want to complete the withdrawal process for.
3. Click on the **Complete withdrawal** button. This will prompt a transaction on your web3 wallet.
Once the transaction is executed on the blockchain you will receive your assets and your withdrawal will be completed.
{% endtab %}
{% endtabs %}